A simple Registration and Login backend using NodeJS and MySQL
Step 1: Setup MySQL on your system
(a) Install mySQL:
Download MySQL Community Server from
https://dev.mysql.com/downloads/mysql/
(b) Install mySQL Workbench
This is a GUI tool that allow you to easily work with mySQL.
Download MySQL Workbench from
https://downloads.mysql.com/archives/workbench/
MySQL Workbench 8.0.19 (compatible with Catalina 10.15)
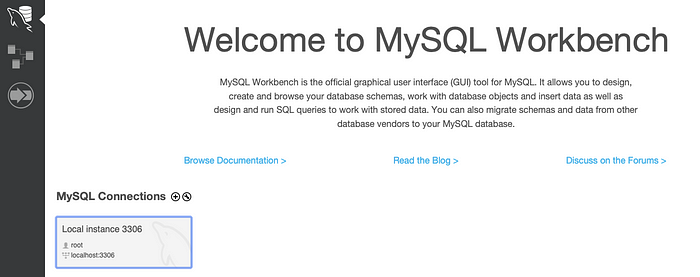
After you download your mySQL Workbench, it should automatically be
connected to your “root” mySQL database.
(c) Create a new Database
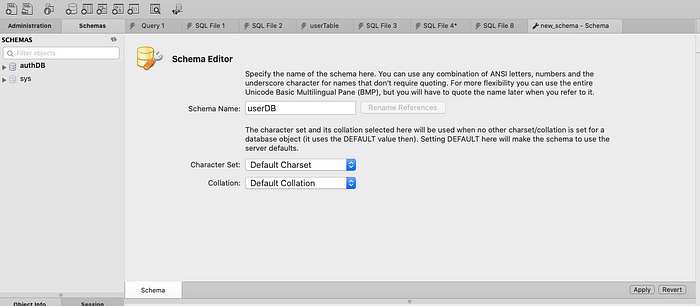
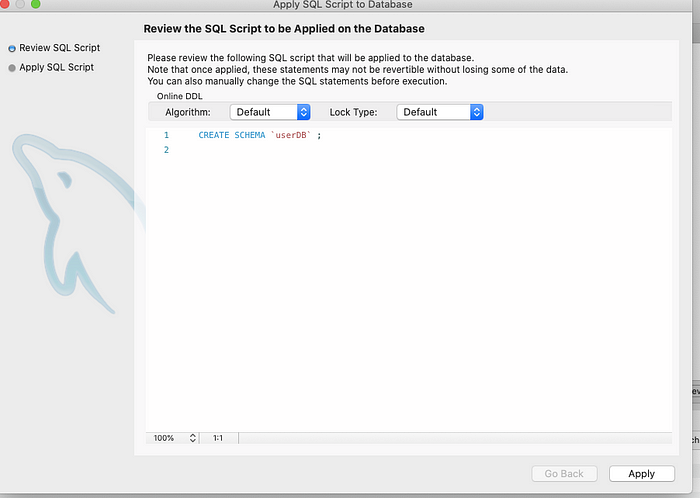
Click on the “Create new schema” icon, on the mySQL Workbench toolbar, and name your new schema “userDB”, then click on “Apply” on the lower right side.
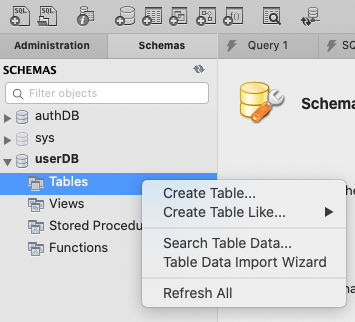
You will now see the “userDB” database on the left side bar. Click on it to expand the “userDB”, then mouse over to the userDB → Tables, and right click to “Create Table”
(d) Create a userTable in the userDB
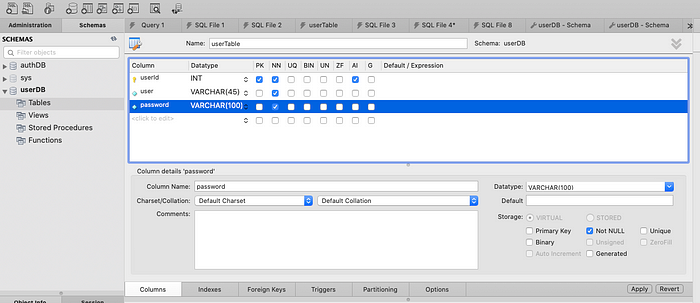
Create a table with the following columns
- userId: INTEGER — Primary Key (PK), Not Null (NN), AutoIncrement (AI)
- user: VARCHAR(45) — Not Null (NN)
- password: VARCHAR (100) — Not Null (NN)
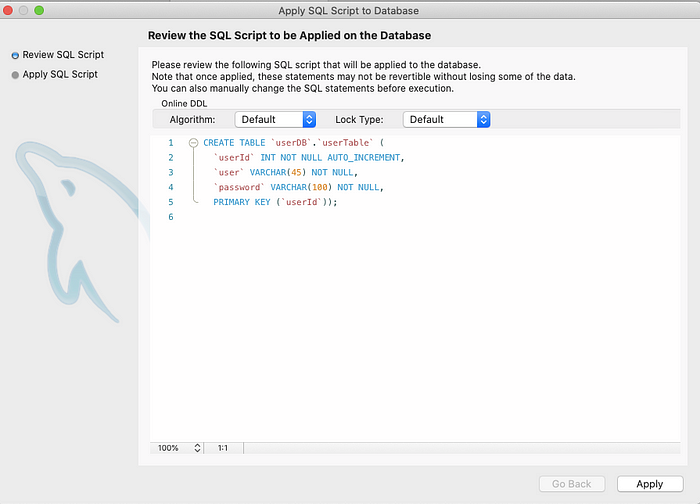
Click on “Apply” on the lower right, and create this table.
CONGRATULATIONS !!!
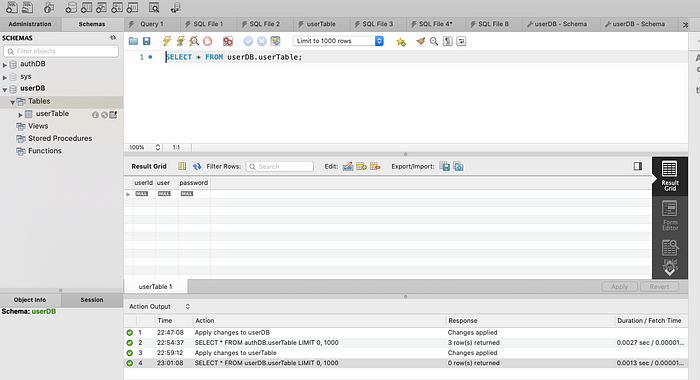
You have finished all the mySQL setup that you need. You can see the “userTable” under the “userDB”
(e) (Optional) Create a new user in mySQL
While you can use the “root” user to connect into your database via Node JS, a better practice is to create a new user, and assign it the limited privileges that include READ, INSERT, DELETE rows in your DB. You do not want to assign Database Administrator privileges to the new user.
To create a new user, click on the “Administration” tab on the top left, and go to “Users and Privileges”, and then click on (ADD ACCOUNT) button on the bottom.
Login Name: newuserAuthentication Type: StandardLimit to Hosts Matching: localhostPassword: password1#NOTE: We will use these credentials in the NodeJS code, to connect to the mySQL DB.
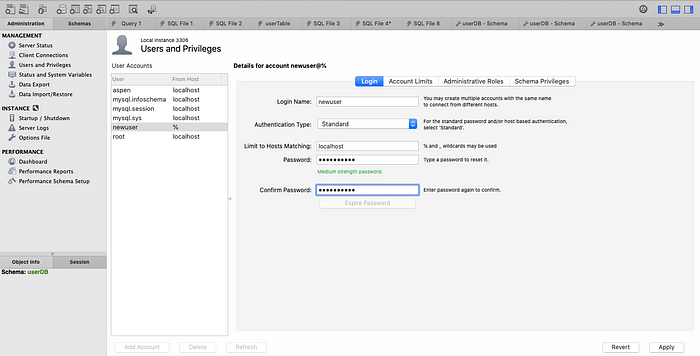
Click on APPLY on the lower right to create new user.
Next go to the SCHEMA PRIVILEGES tab and select (ADD ENTRY)
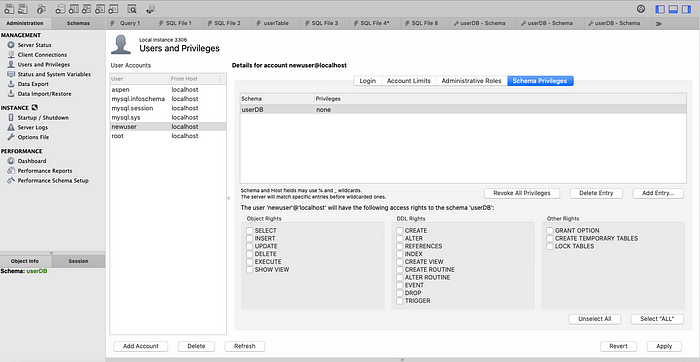
Now add privileges ONLY for row CRUD operations
Click on “Apply”
Your new user is now setup, and we will access the mySQL DB using this new user!
Step 2: Connect your NodeJS App with mySQL DB
(a) Create a new folder and initialize your NodeJS App
$ mkdir db-practice1$ cd db-practice1$ npm init --y//next we will install some node packages$ npm i express mysql$ npm i nodemon dotenv --save-dev//We installed "express" and "mysql", and "nodemon" and "dotenv" as devDependencies
(b) Connect your NodeJS App to your mySQL DB
Create a dbServer.js file as follow,
const express = require("express")const app = express()const mysql = require("mysql")const db = mysql.createPool({connectionLimit: 100,host: "127.0.0.1", //This is your localhost IPuser: "newuser", // "newuser" created in Step 1(e)password: "password1#", // password for the new userdatabase: "userDB", // Database nameport: "3306" // port name, "3306" by default})db.getConnection( (err, connection)=> {if (err) throw (err)console.log ("DB connected successful: " + connection.threadId)})
Now run the dbServer.js file,
$ nodemon dbServerIf all your credentials are correct you see a “DB connected successful” message.
AWESOME!! You are now connected to your mySQL DB!!!
Note: that we use mysql.createPool(), instead of mysql.createConnection(), since we want our application to be PRODUCTION grade.
- *Troubleshooting: In case all your login credentials are fine and you get a connection error, run the following in your mySQL Workbench
ALTER USER 'newuser'@'localhost' IDENTIFIED WITH mysql_native_password BY 'password1#';FLUSH PRIVILEGES;
(c) Create a .env file and hide your DB credentials in there
Create a .env file as follows
DB_HOST = 127.0.0.1DB_USER = newuserDB_PASSWORD = password1#DB_DATABASE = userDBDB_PORT = 3306PORT = 3000
In your dbServer.js file use “dotenv” to import credentials from the .env file.
require("dotenv").config()const DB_HOST = process.env.DB_HOSTconst DB_USER = process.env.DB_USERconst DB_PASSWORD = process.env.DB_PASSWORDconst DB_DATABASE = process.env.DB_DATABASEconst DB_PORT = process.env.DB_PORTconst db = mysql.createPool({connectionLimit: 100,host: DB_HOST,user: DB_USER,password: DB_PASSWORD,database: DB_DATABASE,port: DB_PORT})//remember to include .env in .gitignore file
Step 3 — Setup your NodeJS App and Routes
(a) Get the NodeJS server running
Add the following to dbServer.js file
const port = process.env.PORTapp.listen(port,()=> console.log(`Server Started on port ${port}...`))
Once you save your file, nodemon will refresh and will get your Express JS server up and running!
(b) Register a new user (save in mySQL DB)
Now you are ready to create routes to Register a new user. Note that we will be using bcrypt to store hashed passwords in our DB.
So let’s first npm install bcrypt.
$ npm i bcryptNow in your dbServer.js let’s add a route to “createUser”
const bcrypt = require("bcrypt")app.use(express.json())//middleware to read req.body.<params>//CREATE USERapp.post("/createUser", async (req,res) => {const user = req.body.name;const hashedPassword = await bcrypt.hash(req.body.password,10);db.getConnection( async (err, connection) => { if (err) throw (err)const sqlSearch = "SELECT * FROM userTable WHERE user = ?"const search_query = mysql.format(sqlSearch,[user])const sqlInsert = "INSERT INTO userTable VALUES (0,?,?)"const insert_query = mysql.format(sqlInsert,[user, hashedPassword])// ? will be replaced by values// ?? will be replaced by stringawait connection.query (search_query, async (err, result) => {if (err) throw (err)console.log("------> Search Results")console.log(result.length)if (result.length != 0) {connection.release()console.log("------> User already exists")res.sendStatus(409)}else {await connection.query (insert_query, (err, result)=> {connection.release()if (err) throw (err)console.log ("--------> Created new User")console.log(result.insertId)res.sendStatus(201)})}}) //end of connection.query()}) //end of db.getConnection()}) //end of app.post()
While the above code may look complicated here is what we are doing,
1. We first store the "req.body.name" in "user"2. We then use the bcrypt.hash() function to hash the "password"NOTE: that the bcrypt.hash() function may take a while to generate the hash, and so we use the "await" keyword in front of it. Since we are using the "await" keyword within the function, we need to add "async" keyword in front of the function."async" and "await" are basically "syntactical sugar", or a neater way to write promises in Javascript. Ideally we want to include the "await" part in a "try/catch" block that represents the "resolve/reject" parts of the Promise. However we will forego this, to keep our code simple and readable for the purposes of this tutorial.3. We then use the db.getConnection() function to get a new connection. This function may have 2 outcomes, either an "error" or a "connection". i.e. db.getConnection ( (err, connection) )4. In case we get the connection, we can then QUERY the connection, using connection.query(). Note that since the query() function may take some time to respond, we use the keyword "await" in front of it. Accordingly we need to include the "async" keyword in front of the parent function.i.e. db.getConnection ( async (err, connection) => {await connection.query(<query>)})5. The construction of the query strings are particularly interesting,const sqlSearch = "SELECT * FROM userTable WHERE user = ?"const search_query = mysql.format(sqlSearch,[user])const sqlInsert = "INSERT INTO userTable VALUES (0,?,?)"const insert_query = mysql.format(sqlInsert,[user, hashedPassword])NOTE: Basically the ? will get replaced by the values in the []Also, notice that in the INSERT query we are using (0,?,?), this is because the first column in our userDB is an AUTOINCREMENT column. So we pass either a "0" or "null", and the mySQL database will assign the next autoincrement value from its sidei.e. we do not need to pass a value in the query, and we want mySQL DB to assign an autoincremented value.6. The reason we have a "search_query" and a "insert_query", is because, we want to check to see if the "user" already exists in our MySQL DB.- In case they do, we do not add them again ("User already exists"). - In case they do NOT exist, we add them to the DB.7. Note that after we make the query, we no longer need the connection and we must call a connection.release()8. The connection.query() function will either have an error OR a result. i.e. connection.query( (err, result) )9. The "results" returns each ROW as an object in an array.Thus if the "search_query" results.length==0, then no ROWs were returned indicating that the user does not exist in the DB
Now that we understand the code, let’s save it up and let nodemon restart the server.
YOUR REGISTRATION BACKEND IS NOW COMPLETE!!!
In order to test our Registration backend, we can use POSTMAN to add a new user as follows,
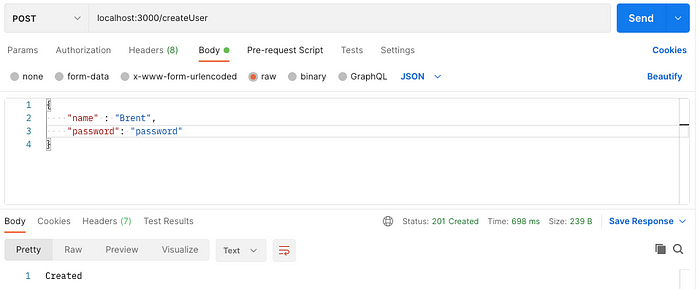
Hurray!!! Your user is successfully created and saved in the mySQL DB!!
In your mySQL DB you will now see that the new user is saved, along with the (hashed) password.

Also, notice that in the mySQL DB the “userId” shows 1, even though we did not explicitly specify this in our “insert_query”. The reason for this is that when we created the DB in Step 1(d), we specified that “userId” will be “AUTO INCREMENT” and in the INSERT query, we left this field “0” or “null”.
So mySQL DB automatically assigns a unique autoincrement value to this column when we insert a new record into the DB.
NOTE: Your console logs will show that the app checked to see if “Brent” exists in the DB, and since that user did not, “Brent” and his “hashedPassword” was added into the mySQL DB.

NOTE: If you attempt to add “Brent” again you will see the following,
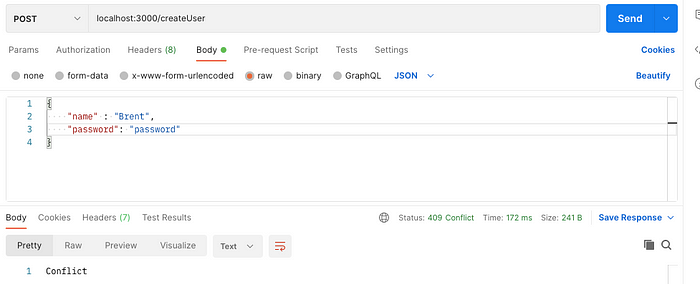
And your logs will show the following
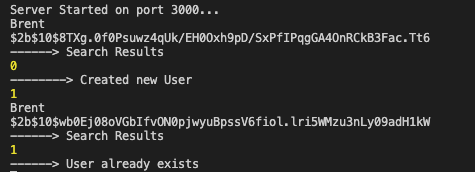
Very Cool !!Now, using POSTMAN let’s add in a few more unique users to our mySQL DB. I added “Kyle”, “Mike”, “Joe”. different value are added here
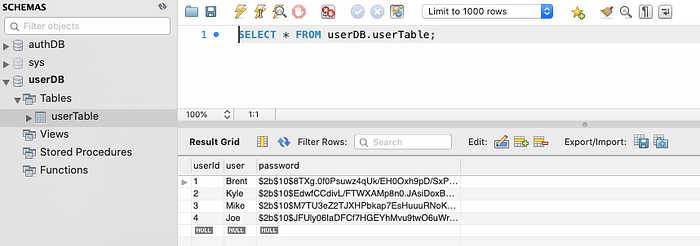
Note that since we are storing hashedPasswords, our system is quite secure since even if the userDB is compromised, the hacker cannot get the passwords directly from the userTable.
(d) Authenticate a Registered user (i.e. Login)
Ok, now that we’ve created a Registration system and are able to create and save new users/passwords in the mySQL database, let’s create a Login system that will authenticate users that attempt to login with the correct username and password.
The authentication steps will be as follows:1. Read the "name" and "password" from the req.body2. Search to see if the user "name" exists in the DB,- If does not exist, return a 404 error- If exists, then get the "hashedPassword" stored in the DB3. Compare the "password" with the "hashedPassword" using bcrypt.compare(<password>, <hashedPassword>)4. if bcrypt.compare() returns true, passwords match and the user is AUTHENTICATED !!
The code for this is as follows,
//LOGIN (AUTHENTICATE USER)app.post("/login", (req, res)=> {const user = req.body.nameconst password = req.body.passworddb.getConnection ( async (err, connection)=> {if (err) throw (err)const sqlSearch = "Select * from userTable where user = ?"const search_query = mysql.format(sqlSearch,[user])await connection.query (search_query, async (err, result) => {connection.release()if (err) throw (err)if (result.length == 0) {console.log("--------> User does not exist")res.sendStatus(404)}else {const hashedPassword = result[0].password//get the hashedPassword from resultif (await bcrypt.compare(password, hashedPassword)) {console.log("---------> Login Successful")res.send(`${user} is logged in!`)}else {console.log("---------> Password Incorrect")res.send("Password incorrect!")} //end of bcrypt.compare()}//end of User exists i.e. results.length==0 }) //end of connection.query()}) //end of db.connection()}) //end of app.post()
Let’s test this using Postman
- Let’s use a user that does not exist
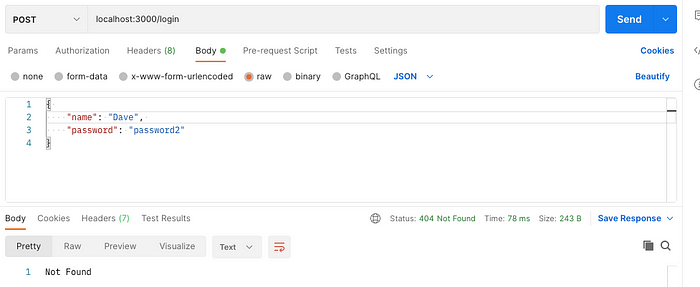
- Let’s now use a user that exists, but an incorrect password
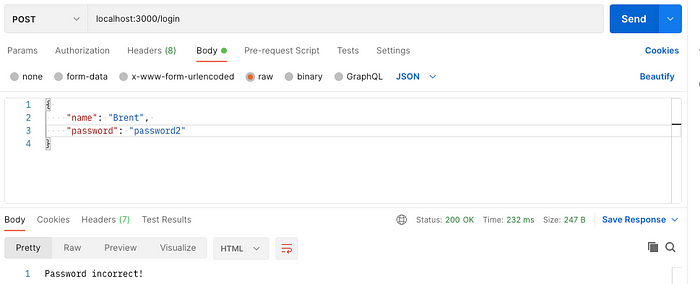
- Let’s now use a user the exists and enter the correct password
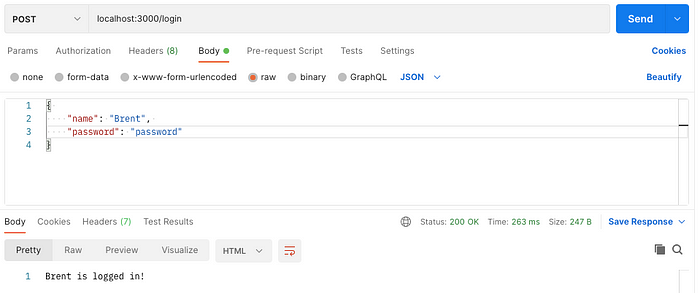
YOUR LOGIN BACKEND IS NOW COMPLETE!!!
(e) (Optional) On Login return an accessToken
In real world systems, once the user is authenticated, we typically want to maintain sessions for the user. One approach of doing this is by using “stateless” session management using JWT tokens.
We can enhance our AUTHENTICATION system, and return an accessToken to authenticated users once they successfully login.
const generateAccessToken = require("./generateAccessToken")//import the generateAccessToken function//LOGIN (AUTHENTICATE USER, and return accessToken)app.post("/login", (req, res)=> {const user = req.body.nameconst password = req.body.passworddb.getConnection ( async (err, connection)=> {if (err) throw (err)const sqlSearch = "Select * from userTable where user = ?"const search_query = mysql.format(sqlSearch,[user])await connection.query (search_query, async (err, result) => {connection.release()if (err) throw (err)if (result.length == 0) {console.log("--------> User does not exist")res.sendStatus(404)}else {const hashedPassword = result[0].password//get the hashedPassword from resultif (await bcrypt.compare(password, hashedPassword)) {console.log("---------> Login Successful")console.log("---------> Generating accessToken")const token = generateAccessToken({user: user})console.log(token)res.json({accessToken: token})} else {res.send("Password incorrect!")} //end of Password incorrect}//end of User exists}) //end of connection.query()}) //end of db.connection()}) //end of app.post()
To generate the accessToken, you can add the following function in a generateAccessToken.js file and import it into your dbServer.js.
Note that we will be using “jsonwebtoken” library to generate the jwt tokens, so let’s first install it.
$ npm i jsonwebtokenYour generateAccessToken.js file will be as follows
const jwt = require("jsonwebtoken")function generateAccessToken (user) {returnjwt.sign(user, process.env.ACCESS_TOKEN_SECRET, {expiresIn: "15m"})}module.exports=generateAccessToken
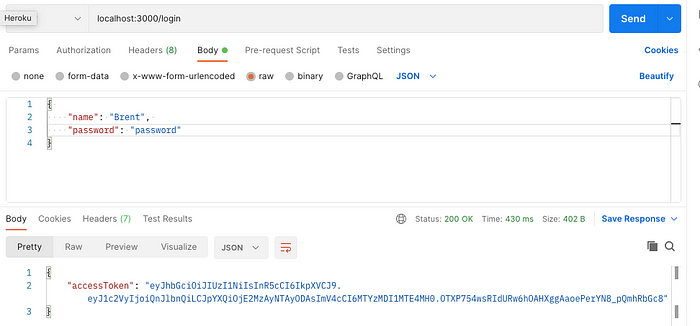
Now when you login using the correct user and password, the App will return an accessToken, that can be used to access authorized resources after login.
.png)


